Welcome to Chris Johnson's Lost Pages. |
Rocky West Wight Potter 19, number 1211 |
| CONTENTS Keel cable Keel cap Added storage Electrical system Stern anchor Halyards led aft Miscellaneous |
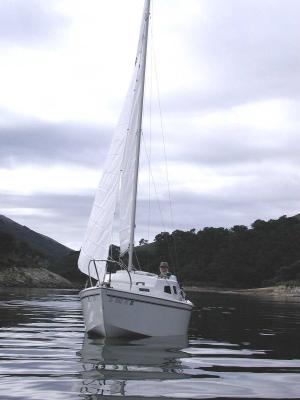 "Rocky" is a West Wight Potter 19, year 2000 model. I purchased the
boat used in November of 2001. The former owner had only sailed it a
few times, had performed no modifications, and kept it garaged. It had
one mishap (a capsize) in its history, but International Marine handled
all required repairs and brought the boat up to factory specs before I
bought it, so it was essentially new.
"Rocky" is a West Wight Potter 19, year 2000 model. I purchased the
boat used in November of 2001. The former owner had only sailed it a
few times, had performed no modifications, and kept it garaged. It had
one mishap (a capsize) in its history, but International Marine handled
all required repairs and brought the boat up to factory specs before I
bought it, so it was essentially new. Potters reach their new owners ready to sail, but are pretty much "no frills" boats as delivered. Most owners modify or customize them somehow. I can't own a boat without tinkering with it, so Rocky now offers the benefits (?) of several popular modifications. I have also made a couple of minor mods that I think are unique. Important: The information here is not intended as any kind of a guide or recommendation regarding modifications that may be applicable to your (or any other) boat. I have tried to adhere to good design and construction practices, but if you choose to try anything you see here, you do so at your own risk. Anyone who seriously contemplates such work on their Potter should at least contact International Marine for support and further information. A wealth of information is also available at the Trailer Sailor forum at www.trailersailor.com. |
| Keel cable | |
 |
The standard boat has a
stainless steel cable attached to the keel that runs up to blocks on
the cabin top and aft to the keel lifting winch. The stainless cable
tends to get in the way and cannot easily be detached from the keel. IM
now offers a detachable cable as an option, but this was not available
before 2002. I replaced the cable with low stretch synthetic line and replaced the associated hardware on the keel with two eyebolts. A single block with removable clevis pin threaded on the line provides mechanical advantage equal to the original fixed block, and a single stainless quick link terminates the line. Materials:
|
| Keel cap | |
 |
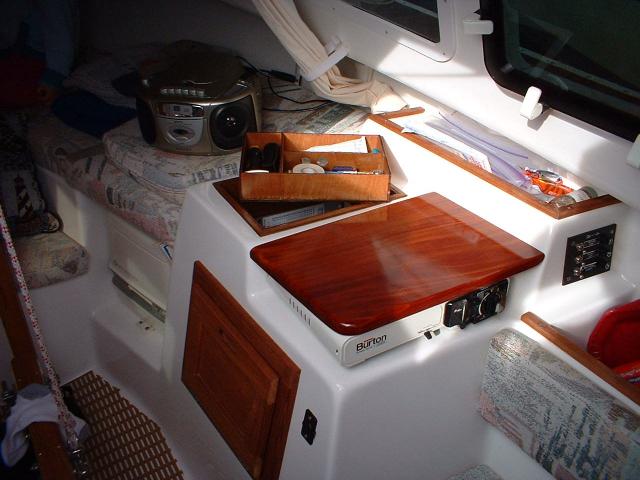
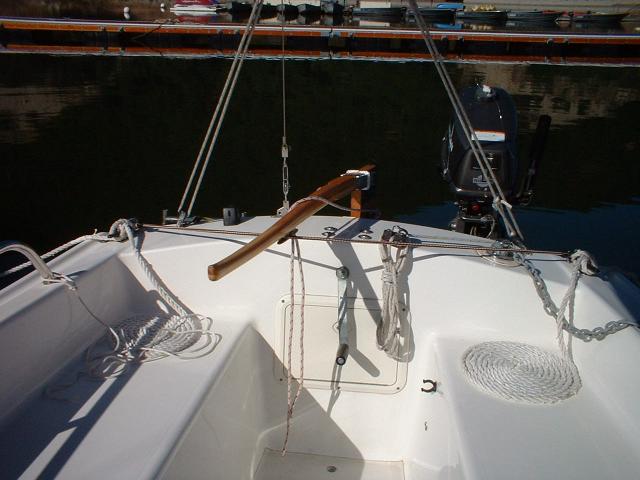
Once the cable is out of the way, it makes sense to have a useful cap on the keel. This one is made of 3/4" genuine mahogany, with a 1/4" deep channel routed in the bottom to fit securely on top of the keel. An eyebolt on each end with shock cord strung on it holds the cap down. The hooks on the shock cord hook onto the eyebolts on the keel. The cap can serve as a small table or a seat. I remove it when sailing, so I can stand on the keel to reach the mast. |
| Added storage | |
The P19 has lots of
storage space, but some of it is difficult to reach or use efficiently.
Rocky has these minor mods to improve the use of space:
|
|
| Vee berth storage bin | |
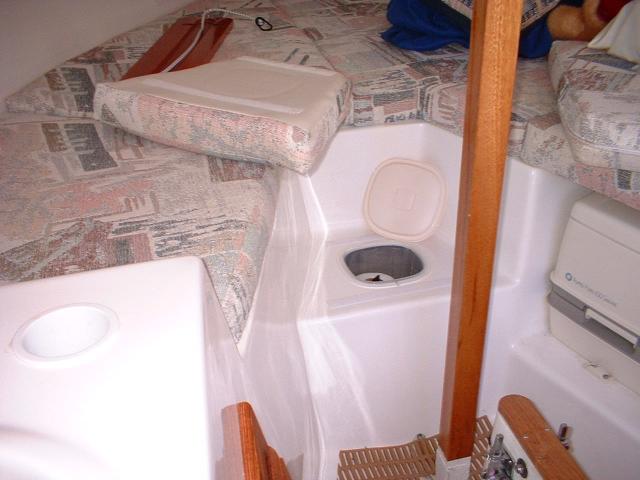 |
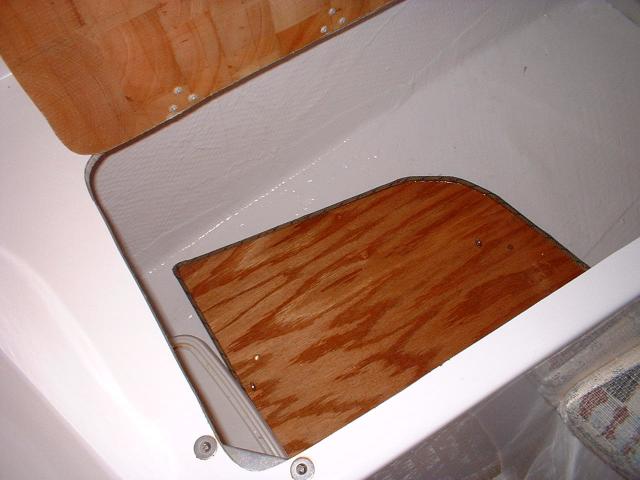
This is a Rubbermaid bin (#3921). It fits in a hole cut under the seat cushion and lined with Flex Trim. The bin is removable, watertight, and you can't tell it is there with the cushion in place. Removing the bin provides access to the automatic bilge pump and the depth sounder transducer. |
| Countertop storage bin | |
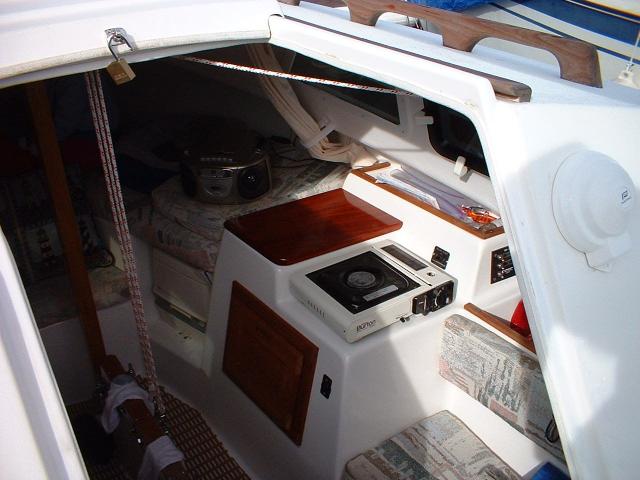 |
The storage space to the left of the stove is essentially wasted in the stock boat. A drawer would be nice there, but for the money and effort a bin with a lift-out tray seemed like a better idea. The bin and tray are made of Luan plywood; a mahogany cover fits over it. The space works well for tool and small hardware storage. |
 |
|
| Drawer | |
|
|
I added a drawer to make better use of space under the port settee. It is fairly deep, providing about one cubic foot of storage. Logically, there should be a matching drawer on the starboard side, but this project proved to be a lot of work, and I'm not sure another one would be worth it. |
| Cabinet door storage | |
 |
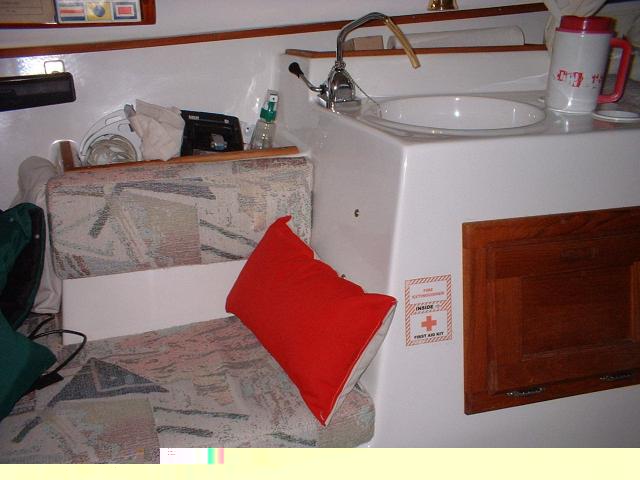
An
Orion "Weekender" first-aid kit is just about the right size to fit
inside the port cabinet door. I tried fastening it several ways; in
this picture it is held on with Velcro strips. This didn't work out, so
now it has a snap-on strap across it. A plastic storage container from the hardware store fits the starboard cabinet door. It is held in place with wood screws. |
| Storage pockets | |
 |
This was a rainy-day project that used up some surplus Sunbrella. Six snap-on storage pockets (one at each berth and two on the aft cabin bulkhead) store books, binoculars, spare lines, etc. The one shown is typical. |
| Bookshelf | |
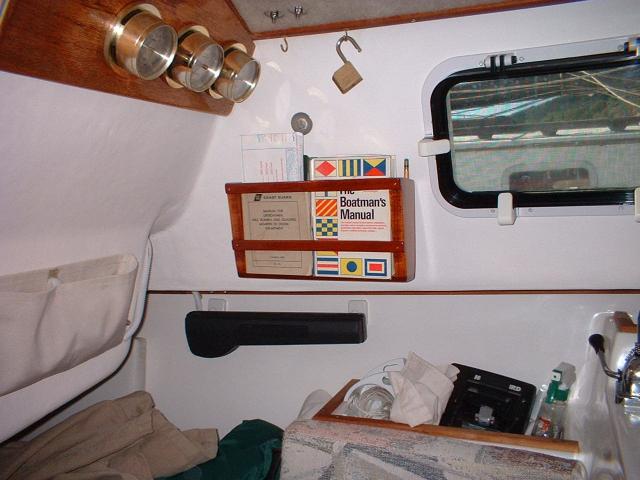 |
This removable bookshelf is made of mahogany scraps and mounts on two small removable-pin hinges. It is big enough for a couple of paperbacks or small hardbacks. A hole drilled in one frame holds a pencil. |
| Cooler shelf | |
 |
The space under the port vee berth is big enough for a cooler (theoretically), but the bottom of it is sloped by the hull. This plywood shelf gets the storage space off the floor and level. The plywood sits on struts shaped to the hull contour and epoxied in place. |
| Jib bag | |
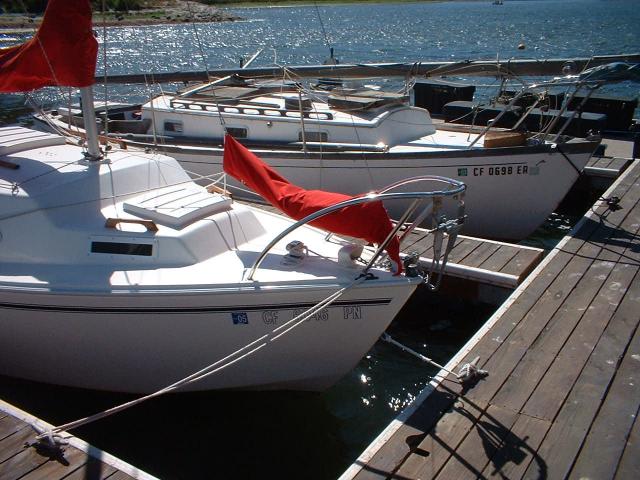 |
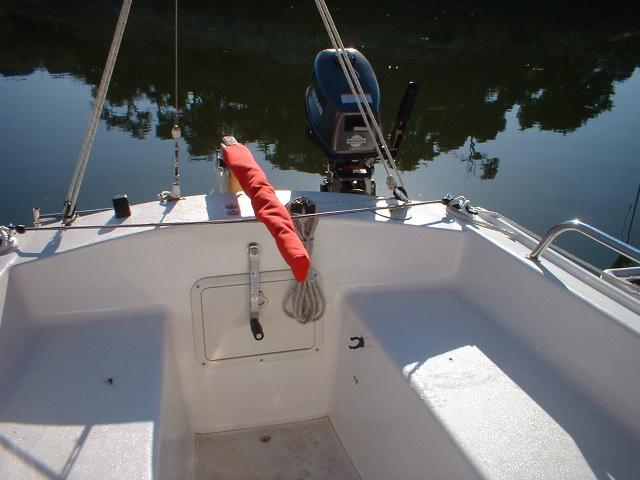
Since Rocky is kept in a slip, it makes sense to keep her rigged for sailing all the time. This bag stores the jib on the foredeck saving a little cabin space and all I have to do when rigging is take off the bag and attach the jib halyard. The design is based on one by Sailrite Kits, modified for the small jib. |
| Electrical system | |
Potters have several
factory options available when it comes to electrical power, but Rocky
had just the basics: a single storage battery, one interior light, and
navigation lights. I added:
|
|
| 12 volt outlets | |
|
|
A 12 volt accessory receptacle is available as an option on new boats, but was not included on mine. Nothing fancy here; just a standard automotive outlet. I added one on each side of the cabin. |
| Automatic bilge pump | |
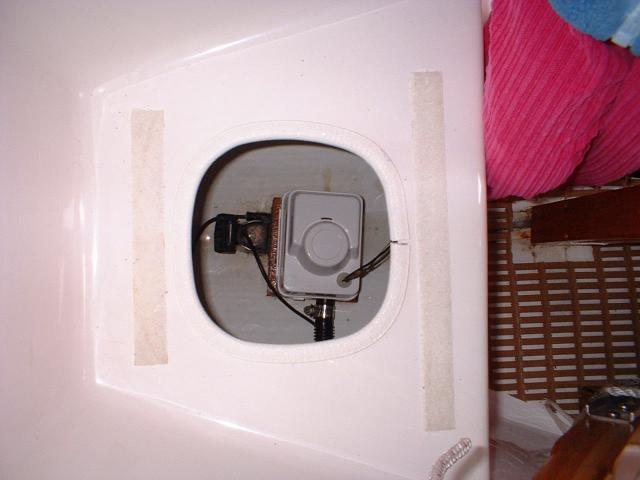 |
This is another factory option that was not included with my boat. I installed two: one under the vee berth center seat (shown) and a second under the cockpit floor. Each pump has an integral float switch and seperate manual/automatic control switches wired directly to the battery. An automatic pump is essential for a boat kept in the water all the time; however, the pumps will only run in the event of a serious problem. |
| Reading lamp | |
 |
The vee berth area isn't lit well by the light over the stove. This gooseneck lamp provides good light in that area, and was easy to wire and install after the wood trim on the mast partner replaced the original metal conduit. This lamp originally used a 10 watt halogen bulb, since replaced with an LED array that uses about 1/10th the power of the original bulb, and delivers nearly as much light. |
| Circuit breaker panel | |
 |
The stock Potter uses three switches and fuses to control the nav lights. These were becoming intermittent on my boat. This six breaker panel uses Blue Sea breakers, with three breakers replace the original switches and the remaining breakers providing circuit protection for instruments, cabin lights, and 12 volt outlets. |
| Solar battery charger | |
| The marina where I keep the boat does not have electric power at the dock. I connect an 11 watt flexible solar panel to the battery from time to time to restore the battery charge. | |
| Outboard motor charging circuit |
|
| Nissan offers an alternator kit
and rectifier kit for the NS-5B; parts 3H6-06128-0 and 3H6-76160-0
respectively. When installed on the motor, it will provide DC voltage
output at around 30 watts at 12 volts. Installation takes a couple of
hours and requires pulling the flywheel. Parts cost is about $80. I
can't say that this is a real useful mod -- the output voltage varies
with engine RPM and does not reach battery charging voltage until about
1/2 throttle -- but there might be times when it is good to know that
you can fire up the engine and get some electricity. |
|
| Stern anchor | |
 |
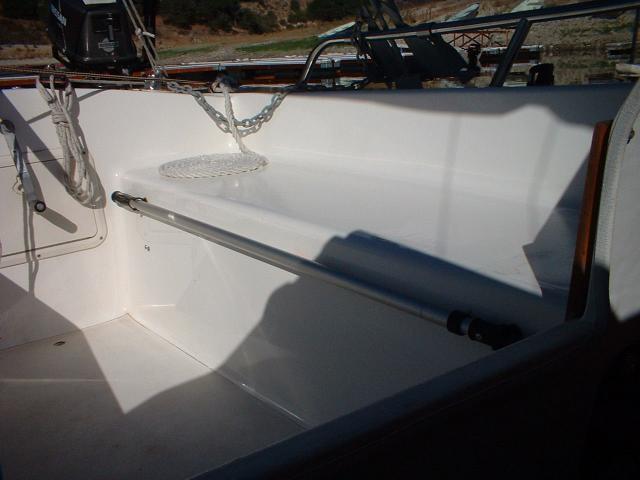
I almost always sail alone, and it was a hassle to go up to the foredeck just to drop a lunch hook. I moved the anchor chocks to the cockpit rail and put a deck plate in the rear deck. A chain pipe mounted on the deck plate allows the anchor rode to drop into a plastic trash can mounted on the inside of the transom. Later I installed another anchor at the bow. |
| Lines led aft to cockpit | |
 |
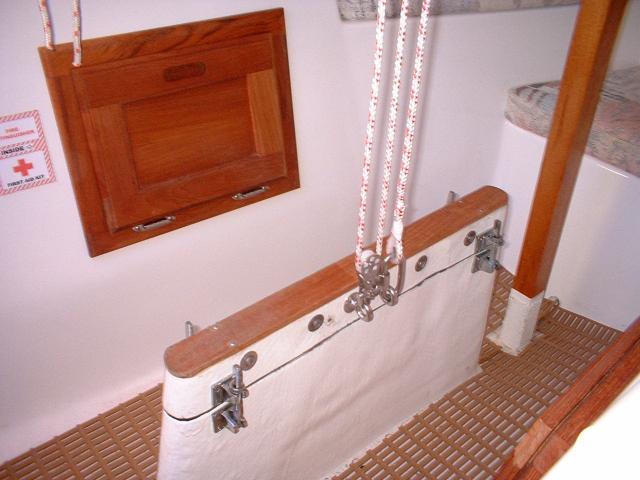
Leading the halyards
and other sail control lines back from the mast to the cockpit is a
fairly popular P19 modification, and Potter owners have found many
different ways to do it. My solution only leads the jib and main halyards and the topping lift sternwards, but it is very cheap and doesn't call for drilling many holes in the cabin top. The turning blocks at the bottom of the mast attach to stainless shackles that replace the forward mast step pin, and the turning blocks at the cabin corners attach to the U-bolts for the mini-stays. The lines are secured at cleats thru-bolted to the cabin top. The original cleats are still on the mast for emergency use. This is admittedly not as elegant or as sophisticated as found on some Potters. Judy B's design, for example, is much more suitable for blue-water sailing. But this cheapie approach is probably safe for the protected waters where I sail. |
| Miscellaneous modifications | |
| Weather instruments/Clock | |
 |
I found a three instrument set at the local swap meet for $5, and mounted them to an African mahogany base cut to fit the aft cabin bulkhead. They are mostly for show but are fairly accurate. |
 |
I had an old chronometer from a boat I sold years ago. It had a bad movement, but the case was OK. I removed the back, replaced the movement with a quartz movement from a hobby shop, then mounted it over the compass back. It works, and better yet, hides the compass case. It does not affect the compass readings. |
| Oil lamp | |
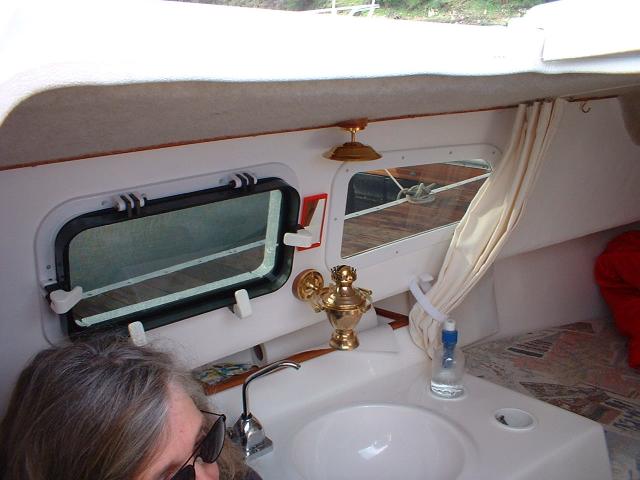 |
Ebay provided a cheap gimballed oil lamp, which is kind of nice on gloomy winter days. It provides some heat as well as light. It is trivial as modifications go, but I recommend it to anyone who spends much time hanging out on their boat. |
| Pole clips | |
 |
I added three sets of "Clipper Clips": one set on the side of the port cockpit seat and two inside above the port quarter berth. The outside set holds the boathook when underway. The inside set holds the mast raising pole and the boathook when the boat is at the dock. |
| Mast partner trim | |
 |
As delivered, the P19 has electrical cables snaked up the mast partner through a steel electrical conduit, which had rusted some and was chafing through the wires at its ends. I removed the conduit and routed out a strip of 3/4" mahogany to fit the mast partner. The cables are hidden and secure and the wood looks a lot better than the old conduit. |
| Sink drain | |
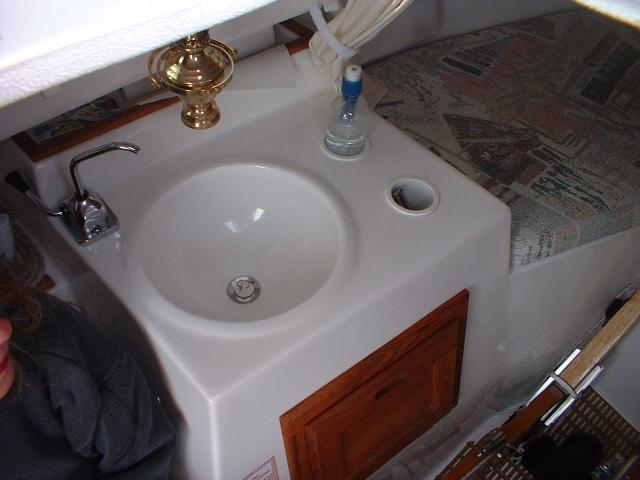 |
The original sink drain emptied into a plastic jug under the sink, and had no plug and did not allow the sink to drain properly. I tapped the thru hull for the bilge pump to allow the drain to drain overboard and replaced the drain fitting with a standard bathroom vanity fitting. |
| Tiller tamer | |
 |
"Real" tiller tamers cost around $30. I added a jam cleat to the underside of the tiller. A bungee stretched between the stern cleats and snapped into the jam cleat tames the tiller satisfactorally, and cost nothing, since I already had the jam cleat. |
| Spare tiller | |
 |
The stock tiller needed refinishing; this one kept the boat functional while I did that. It is shorter than the stock tiller, so works better if there are a few people in the cockpit. |
| Tiller cover | |
 |
After refinishing the tiller, it made sense to make a Sunbrella cover to protect it. |
| Companionway door | |
 |
This is not a modification as such, but maybe is an improvement. The old companionway door was peeling. Rather than refinish it, I made a new one that is the same shape but a bit stronger, and a little tighter fit. |
| Storage pockets | |
|
This was a rainy-day project that used up some surplus Sunbrella. Four snap-on storage pockets (one at each berth) store books, binoculars, spare lines, etc. The one shown is typical. |
| Bow bitt | |
 |
The single cleat at the P19 bow is a bit skimpy for a boat that is kept in a slip. This stainless bow bitt is large enought to accept a few lines at once. It is backed up by a 1/4" mahogany plate and a 1/8" aluminum plate. |
| Companionway seat | |
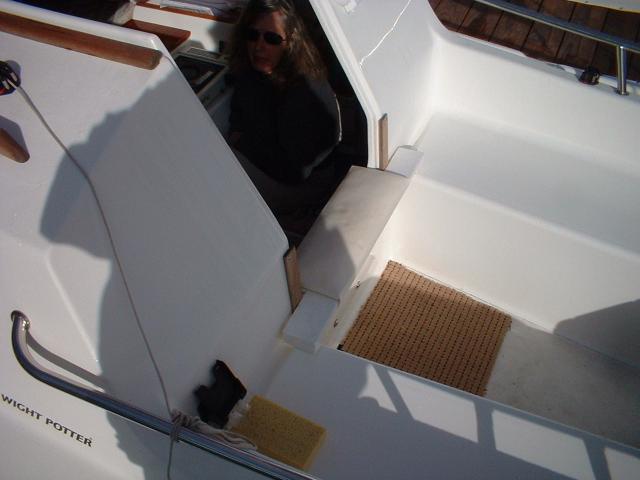 |
A passenger can sit in the companionway with this seat in place. It is made of epoxy coated 3/4" plywood, with a padded center section. The bottom is routed out to fit the edge of the companionway. |
| Motor lock | |
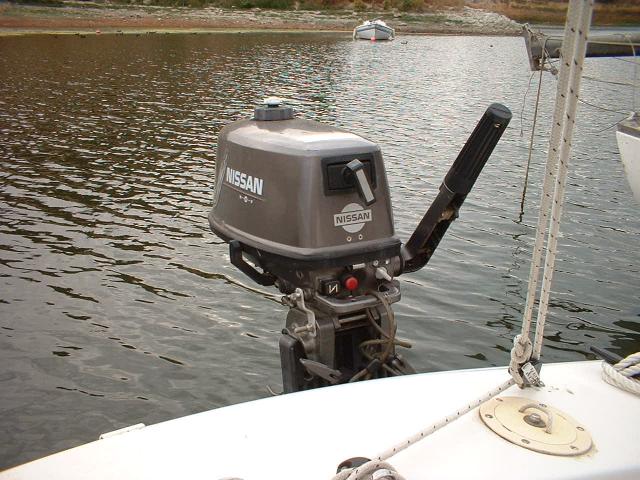 |
Generally, it is easier to steer the boat with the tiller and the motor locked pointing straight ahead, but the factory steering lock on the Nissan 5 is intended to just add friction to the steering. It does not hold well when cinched down all the way, and may strip if tightened too much. For a more positive directional lock, I replaced the motor bracket pivot bolt with a longer one and added a homemade aluminum bracket between the pivot bolt and the motor body. The bracket is attached to the new pivot bolt with a lock nut and to the motor body with a new stainless bolt (added to an existing hole in the motor frame) and wing nut. With the bracket attached, the motor points straight ahead all the time with no side play for easy tiller steering. Detaching the bracket allows normal outboard steering. |
| Bottom paint | |
 |
After
I had Rocky a few months I decided to paint the bottom; not so much
because of marine growth problems but because of potential hull
blistering. I ultimately put on an epoxy barrier coat (Pettit Protect)
followed by two coats of ablative paint. I have since repainted twice.
The paint seems to last about two years. The logistics of bottom painting are tricky for a trailer boat this size. For larger boats, the only option is a boatyard. Trailer boats can be painted at home, but it is difficult to reach all parts of the hull; notably the parts that rest on the trailer bunks. I opted to paint what I could with the boat resting on the bunks, then jack up the hull and support it on 2x8 rails and temporarily remove the bunks to reach the rest of the hull as shown here. I did not paint the keel. I do not really recommend this method. It worked for me, but the risks are high: getting a hand squished or dropping the boat and damaging it. Various other owners have used this or other similar techniques with success, but on the whole I believe a boatyard that can put the boat proper jackstands and that allows do-it-yourselfers to paint their boats may be the best (and is surely the safest) bet. For new boats, International Marine offers bottom paint as a factory option. |
| Quarterberth pillows | |
 |
Another scrap Sunbrella project, these little pillows fit in the settee space better than those at the local discount store. |
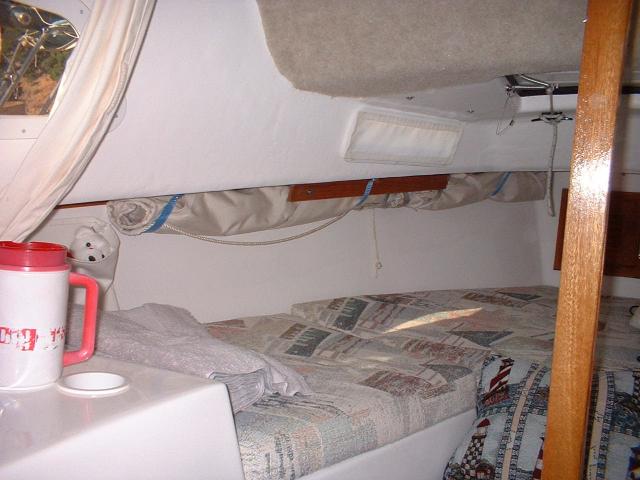
| Sunshade/boom tent | |
 |
This boom-supported sunshade may someday evolve into a boom tent, but no promises... measuring for a boom tent is harder than it seems. These pics show the sunshade up and stowed above the port vee berth. |
 |
|
| This page was updated on March 2, 2010. Copyright (C) 2010, C. Johnson. All Rights Reserved. Please see Legal Notices. |
|